Post-Install Setup: Switch to Free Repository & Update Your Proxmox Server
First steps after installing Proxmox VE — switch from the enterprise repo to the free no-subscription repo, then refresh and upgrade your system.
Series: Proxmox Server — A Visual Step-by-Step Guide This is Part 1. We pick up right after a fresh Proxmox VE installation — no installation walkthrough here, just everything you need to do next.
Why This Matters
A fresh Proxmox install points to the Enterprise repository by default. That repo requires a paid subscription. Without one, every apt update throws an authentication error and blocks you from pulling updates. The fix is quick: swap it for the free no-subscription repo, then update everything.
Step 1 — Log In to the Proxmox Web UI
Open a browser and navigate to your Proxmox host on port 8006:
https://<your-proxmox-ip>:8006You’ll see a login screen. Enter your credentials (root and the password you set during installation) and click Login.
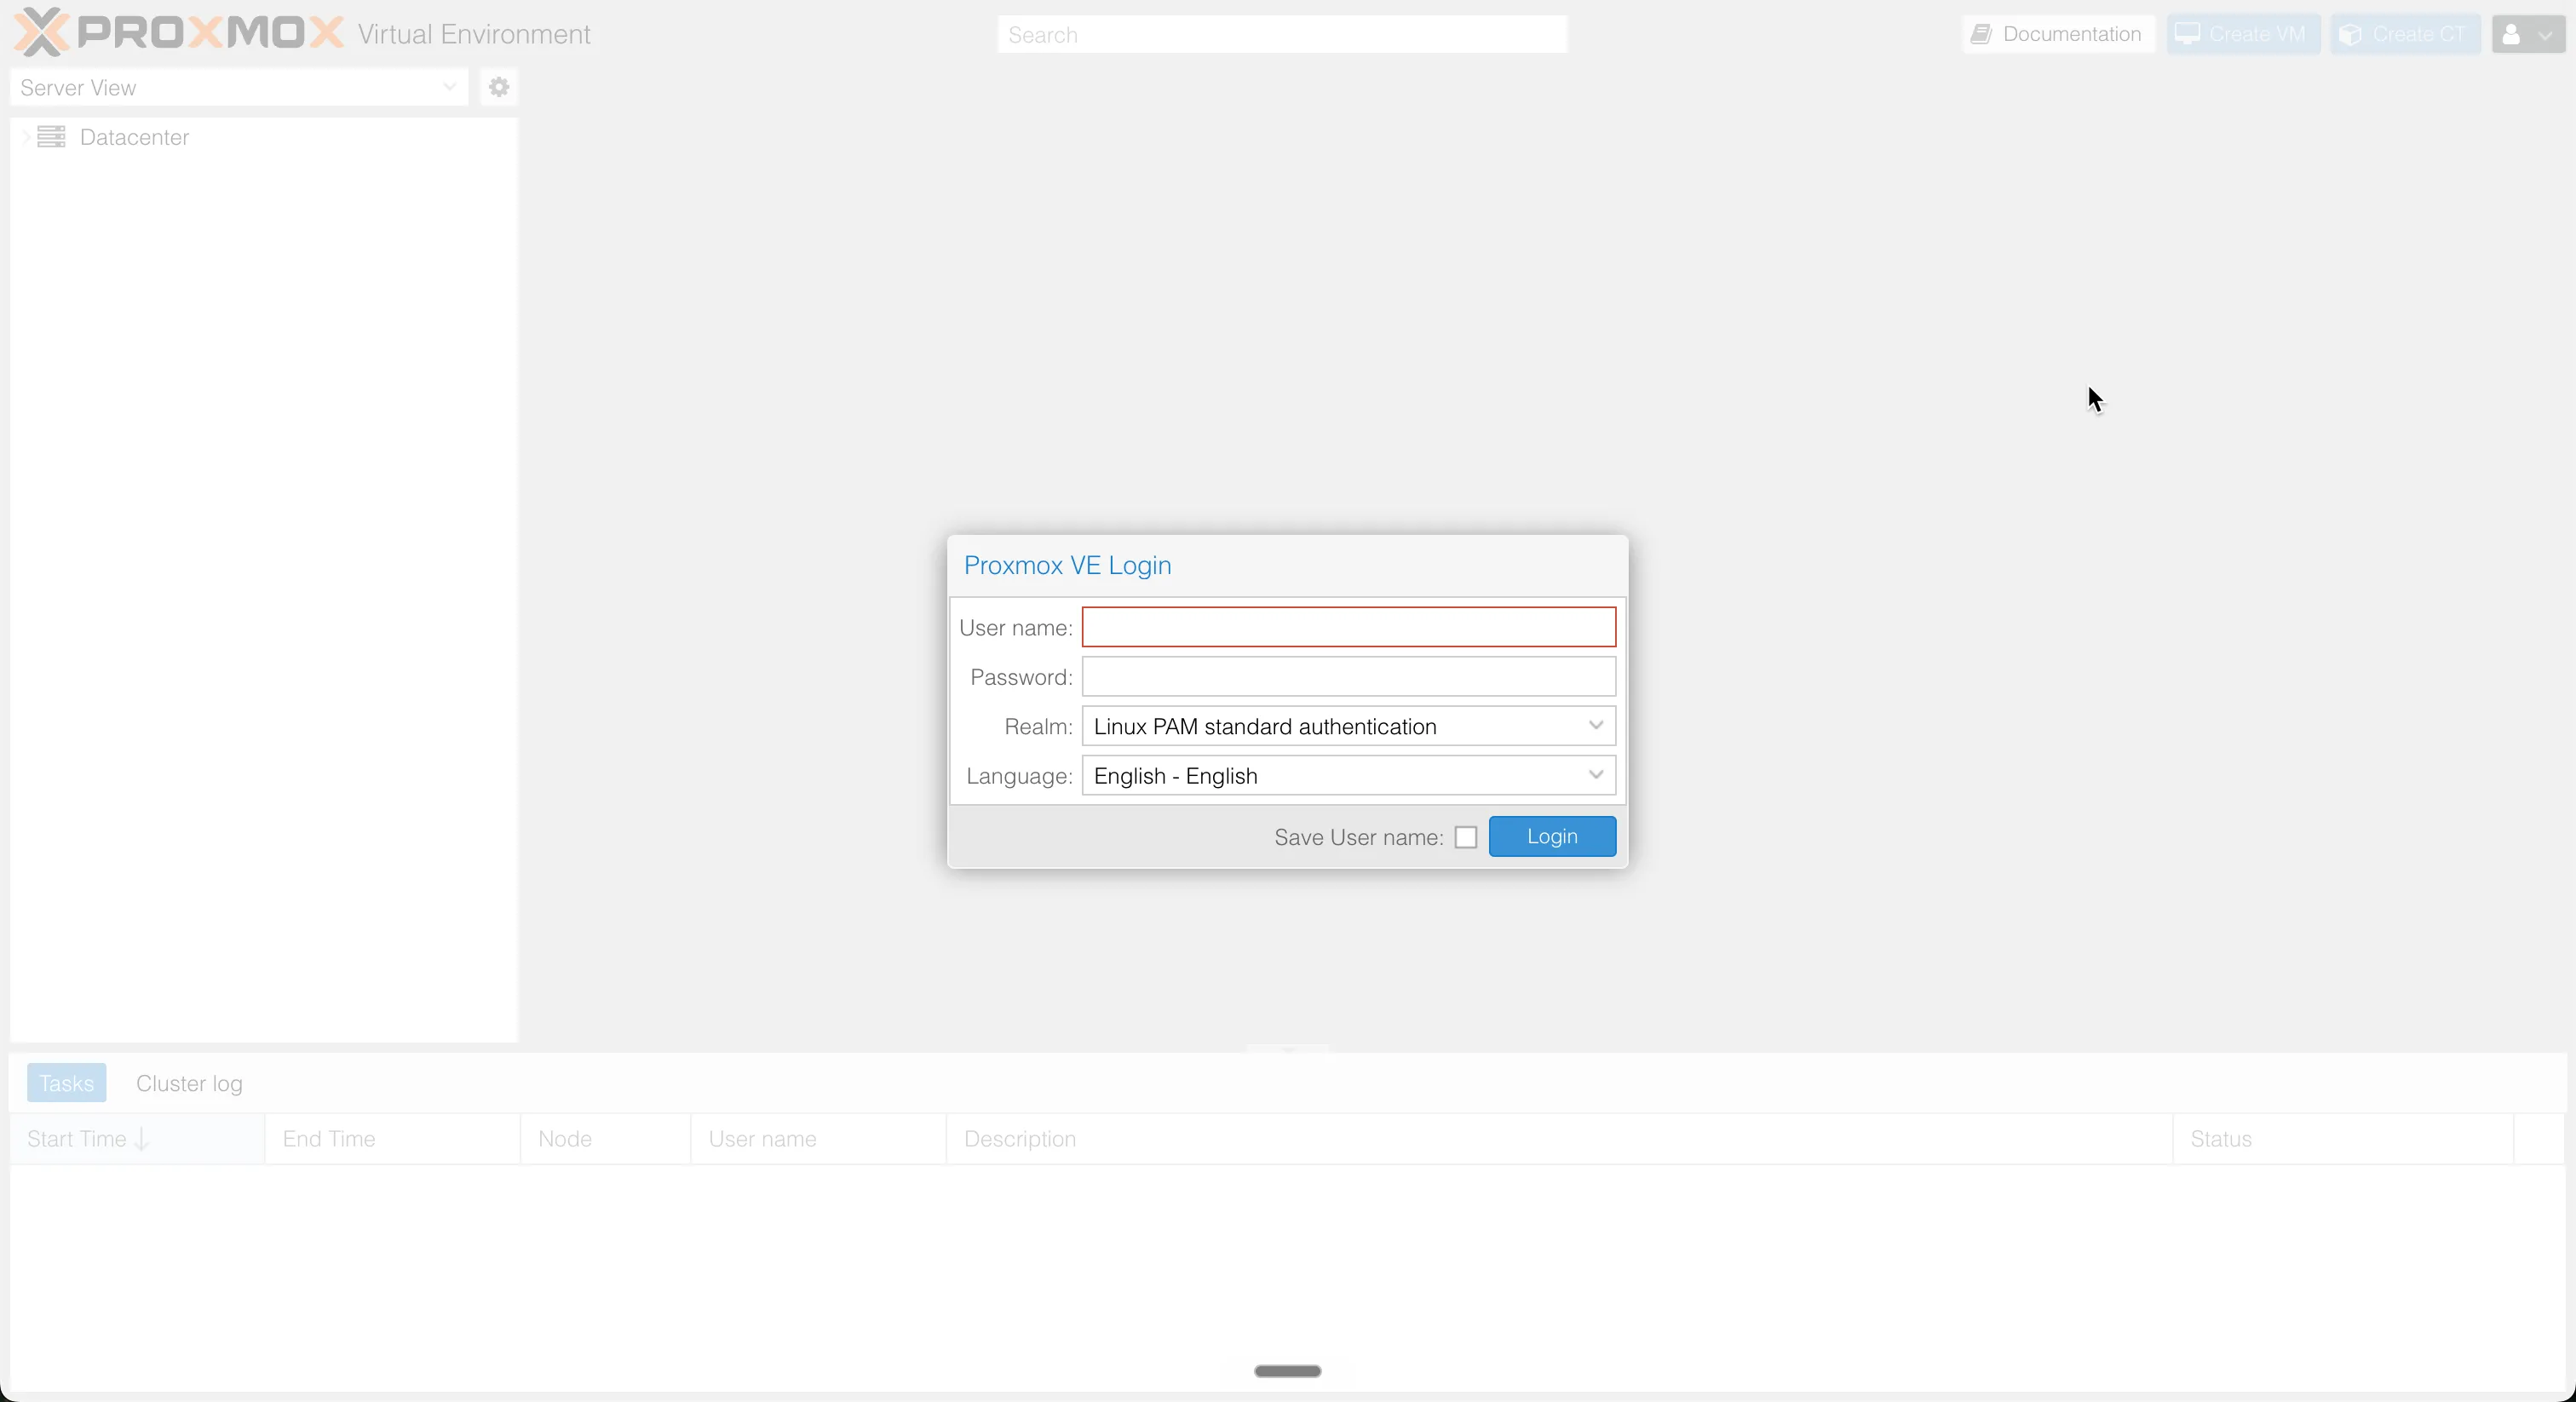
Note: Your browser will warn about an untrusted certificate — this is normal for a self-signed cert. Proceed anyway.
Step 2 — Navigate to Your Node’s Repository Settings
In the left-hand sidebar you’ll see your Datacenter and below it your node (usually named pve). Click on your node to expand it.
Then go to:
Node → Updates → Repositories

You’ll see the list of currently configured APT repositories. The enterprise repo will be listed and enabled.
Step 3 — Disable the Enterprise Repository
Click on the enterprise repository entry:
https://enterprise.proxmox.com/debian/pveThen click the Disable button at the top of the panel.
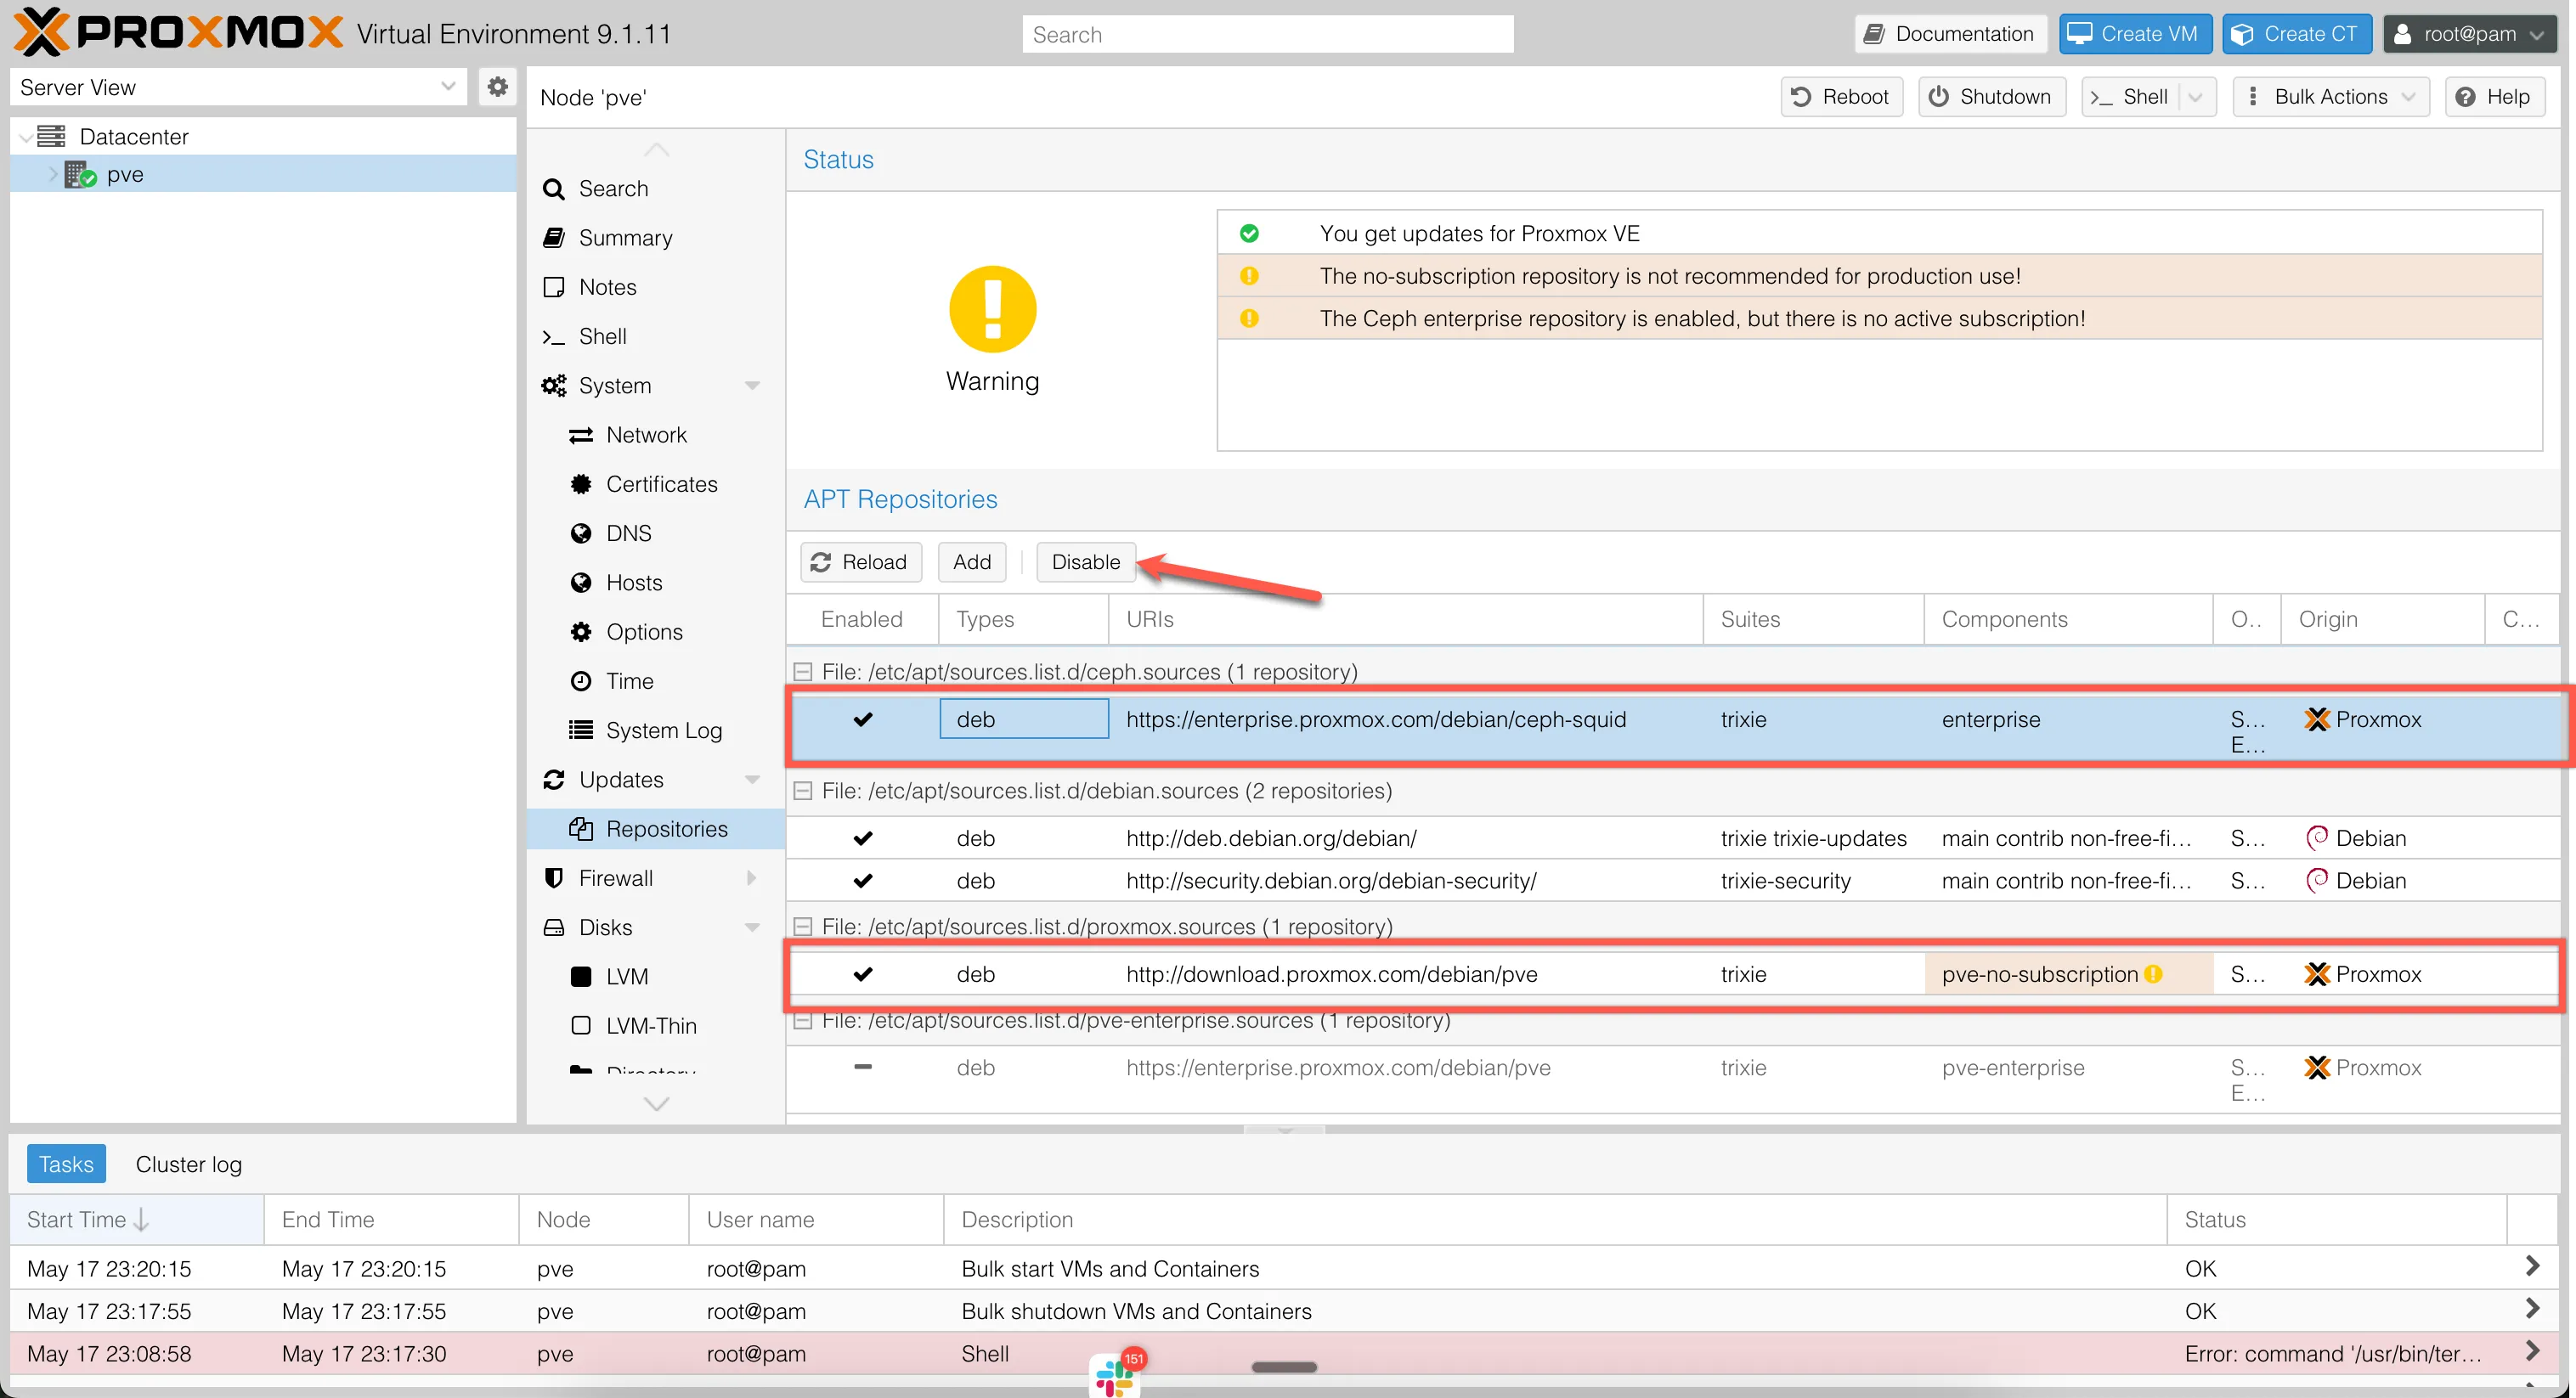
This prevents apt from hitting a repo it can’t authenticate against.
Step 4 — Add the No-Subscription Repository
With the enterprise repo disabled, click Add to add a new repository.
From the dropdown, select:
No-Subscription
Then click Add.
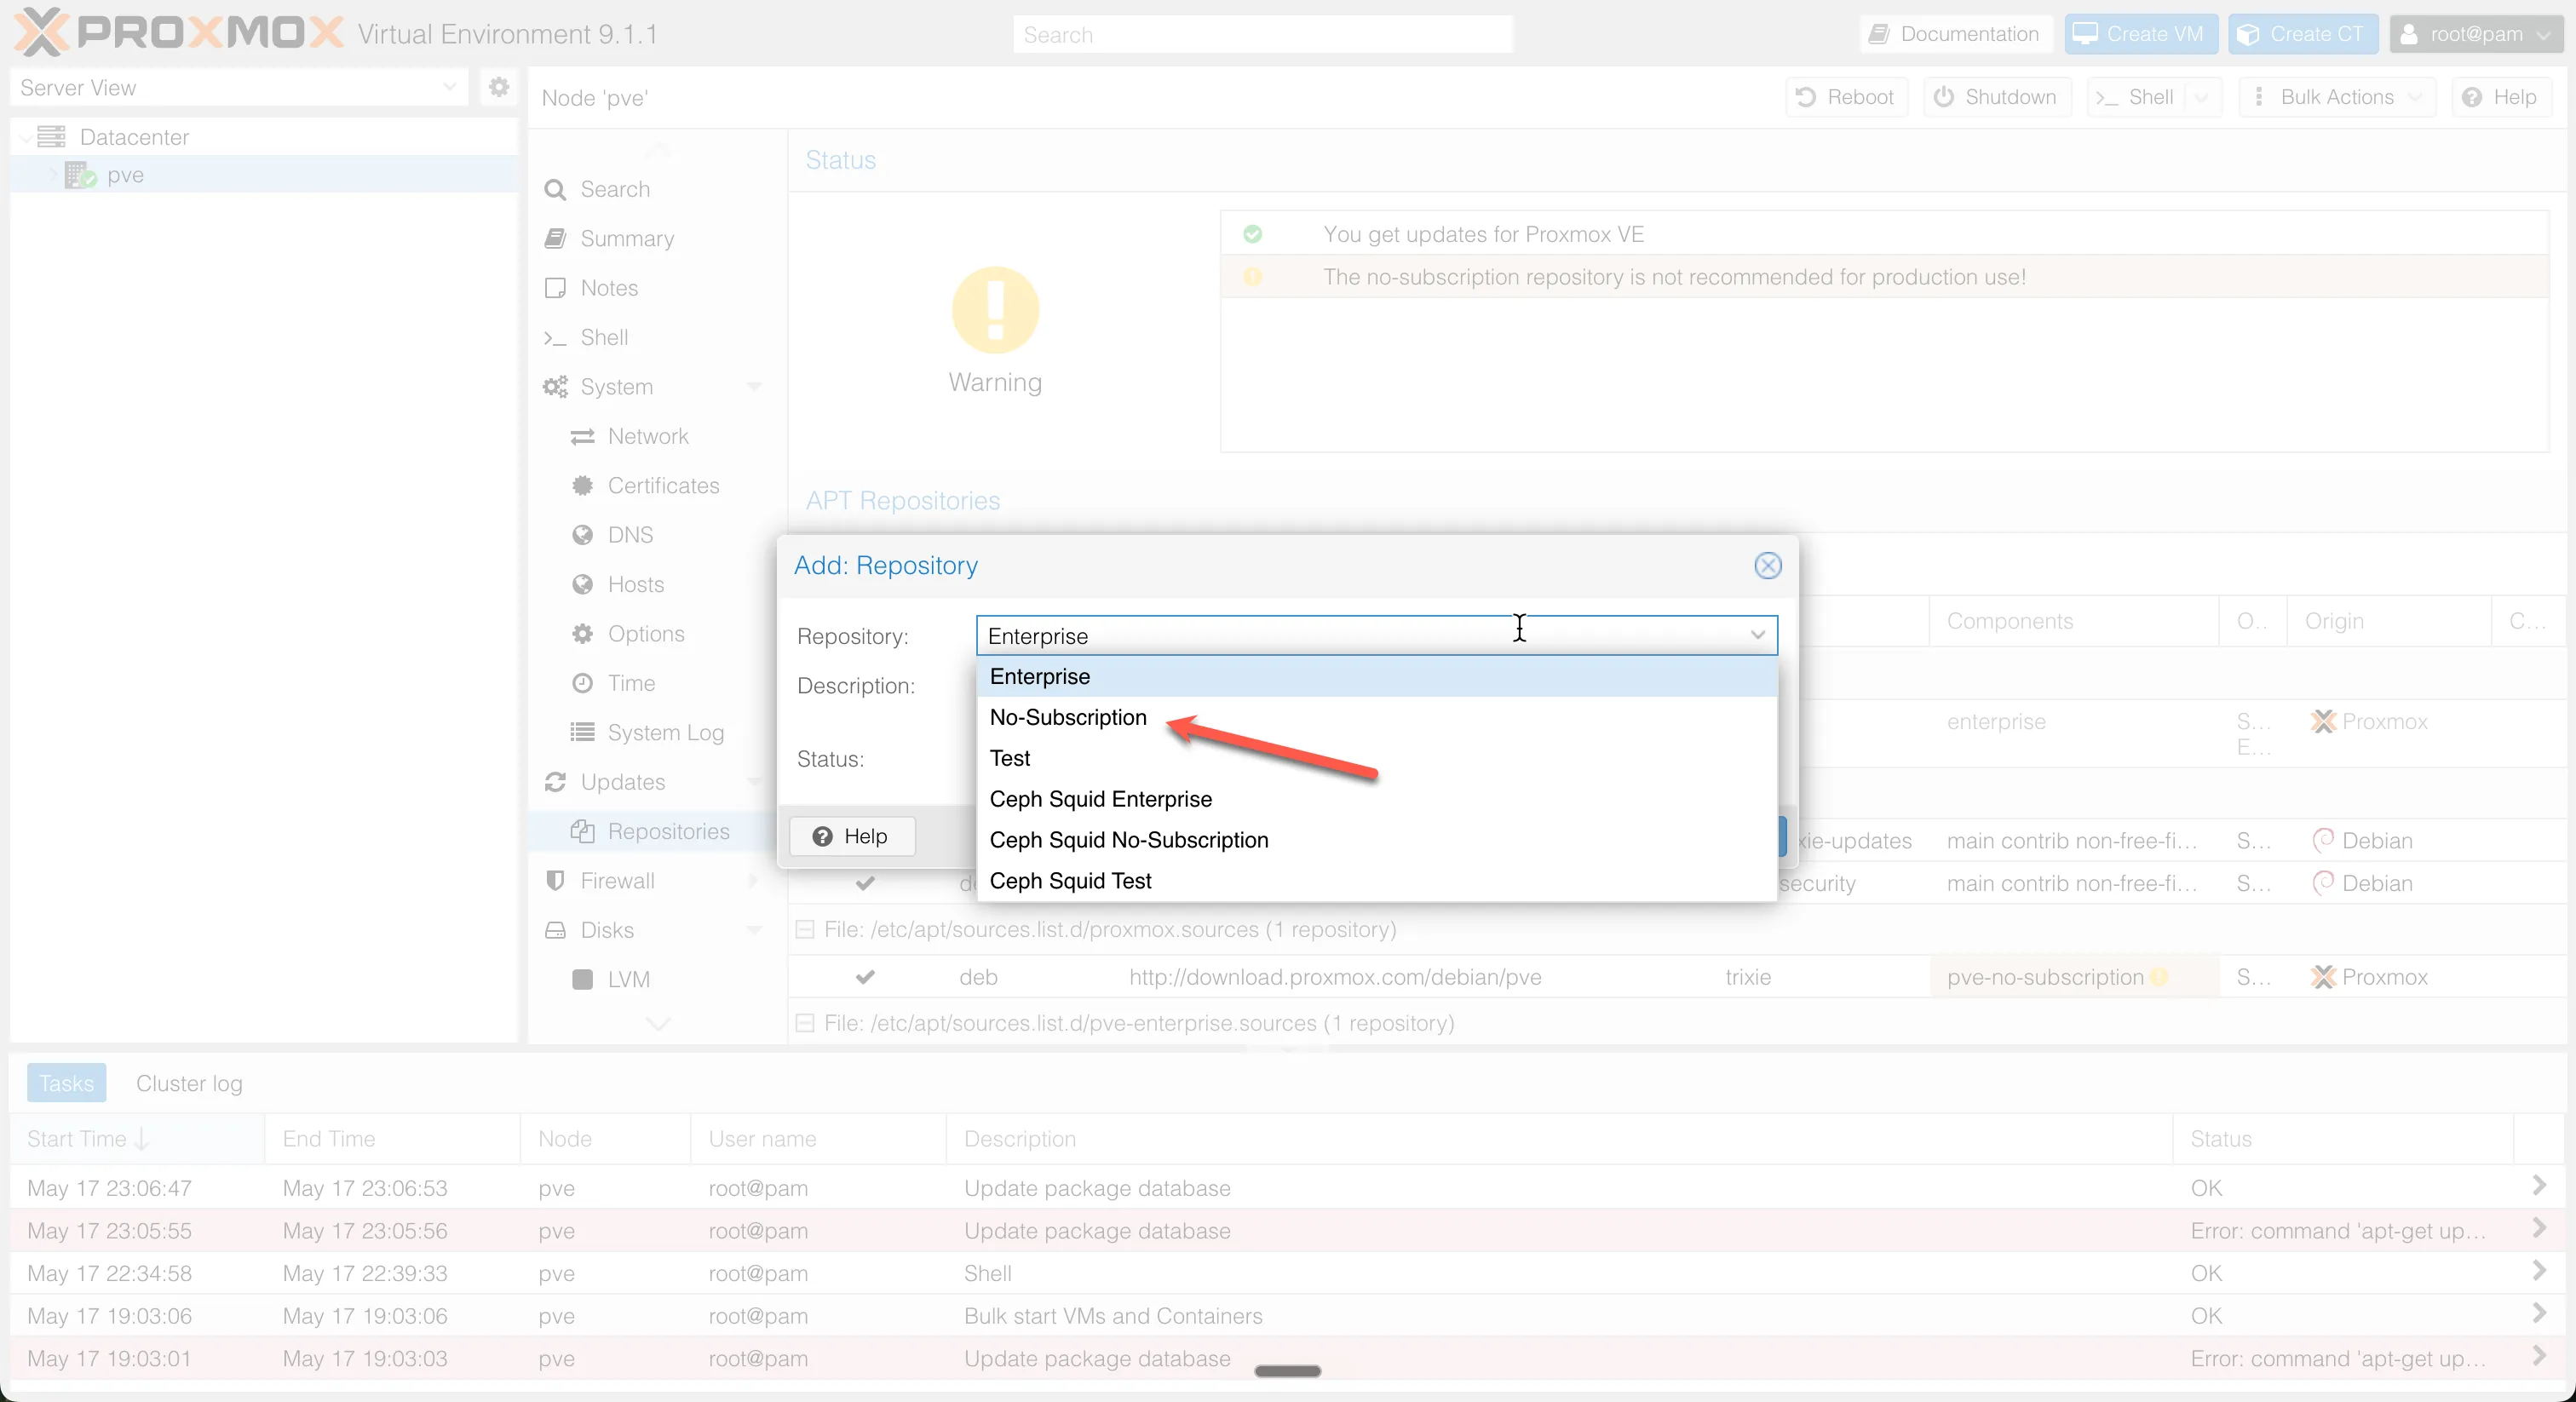
The free Proxmox repository will now appear in your list and be enabled automatically.
Step 5 — Refresh the Package List
Head to:
Node → Updates
Click the Refresh button. This runs apt update in the background against your newly configured repo and fetches the latest package list.
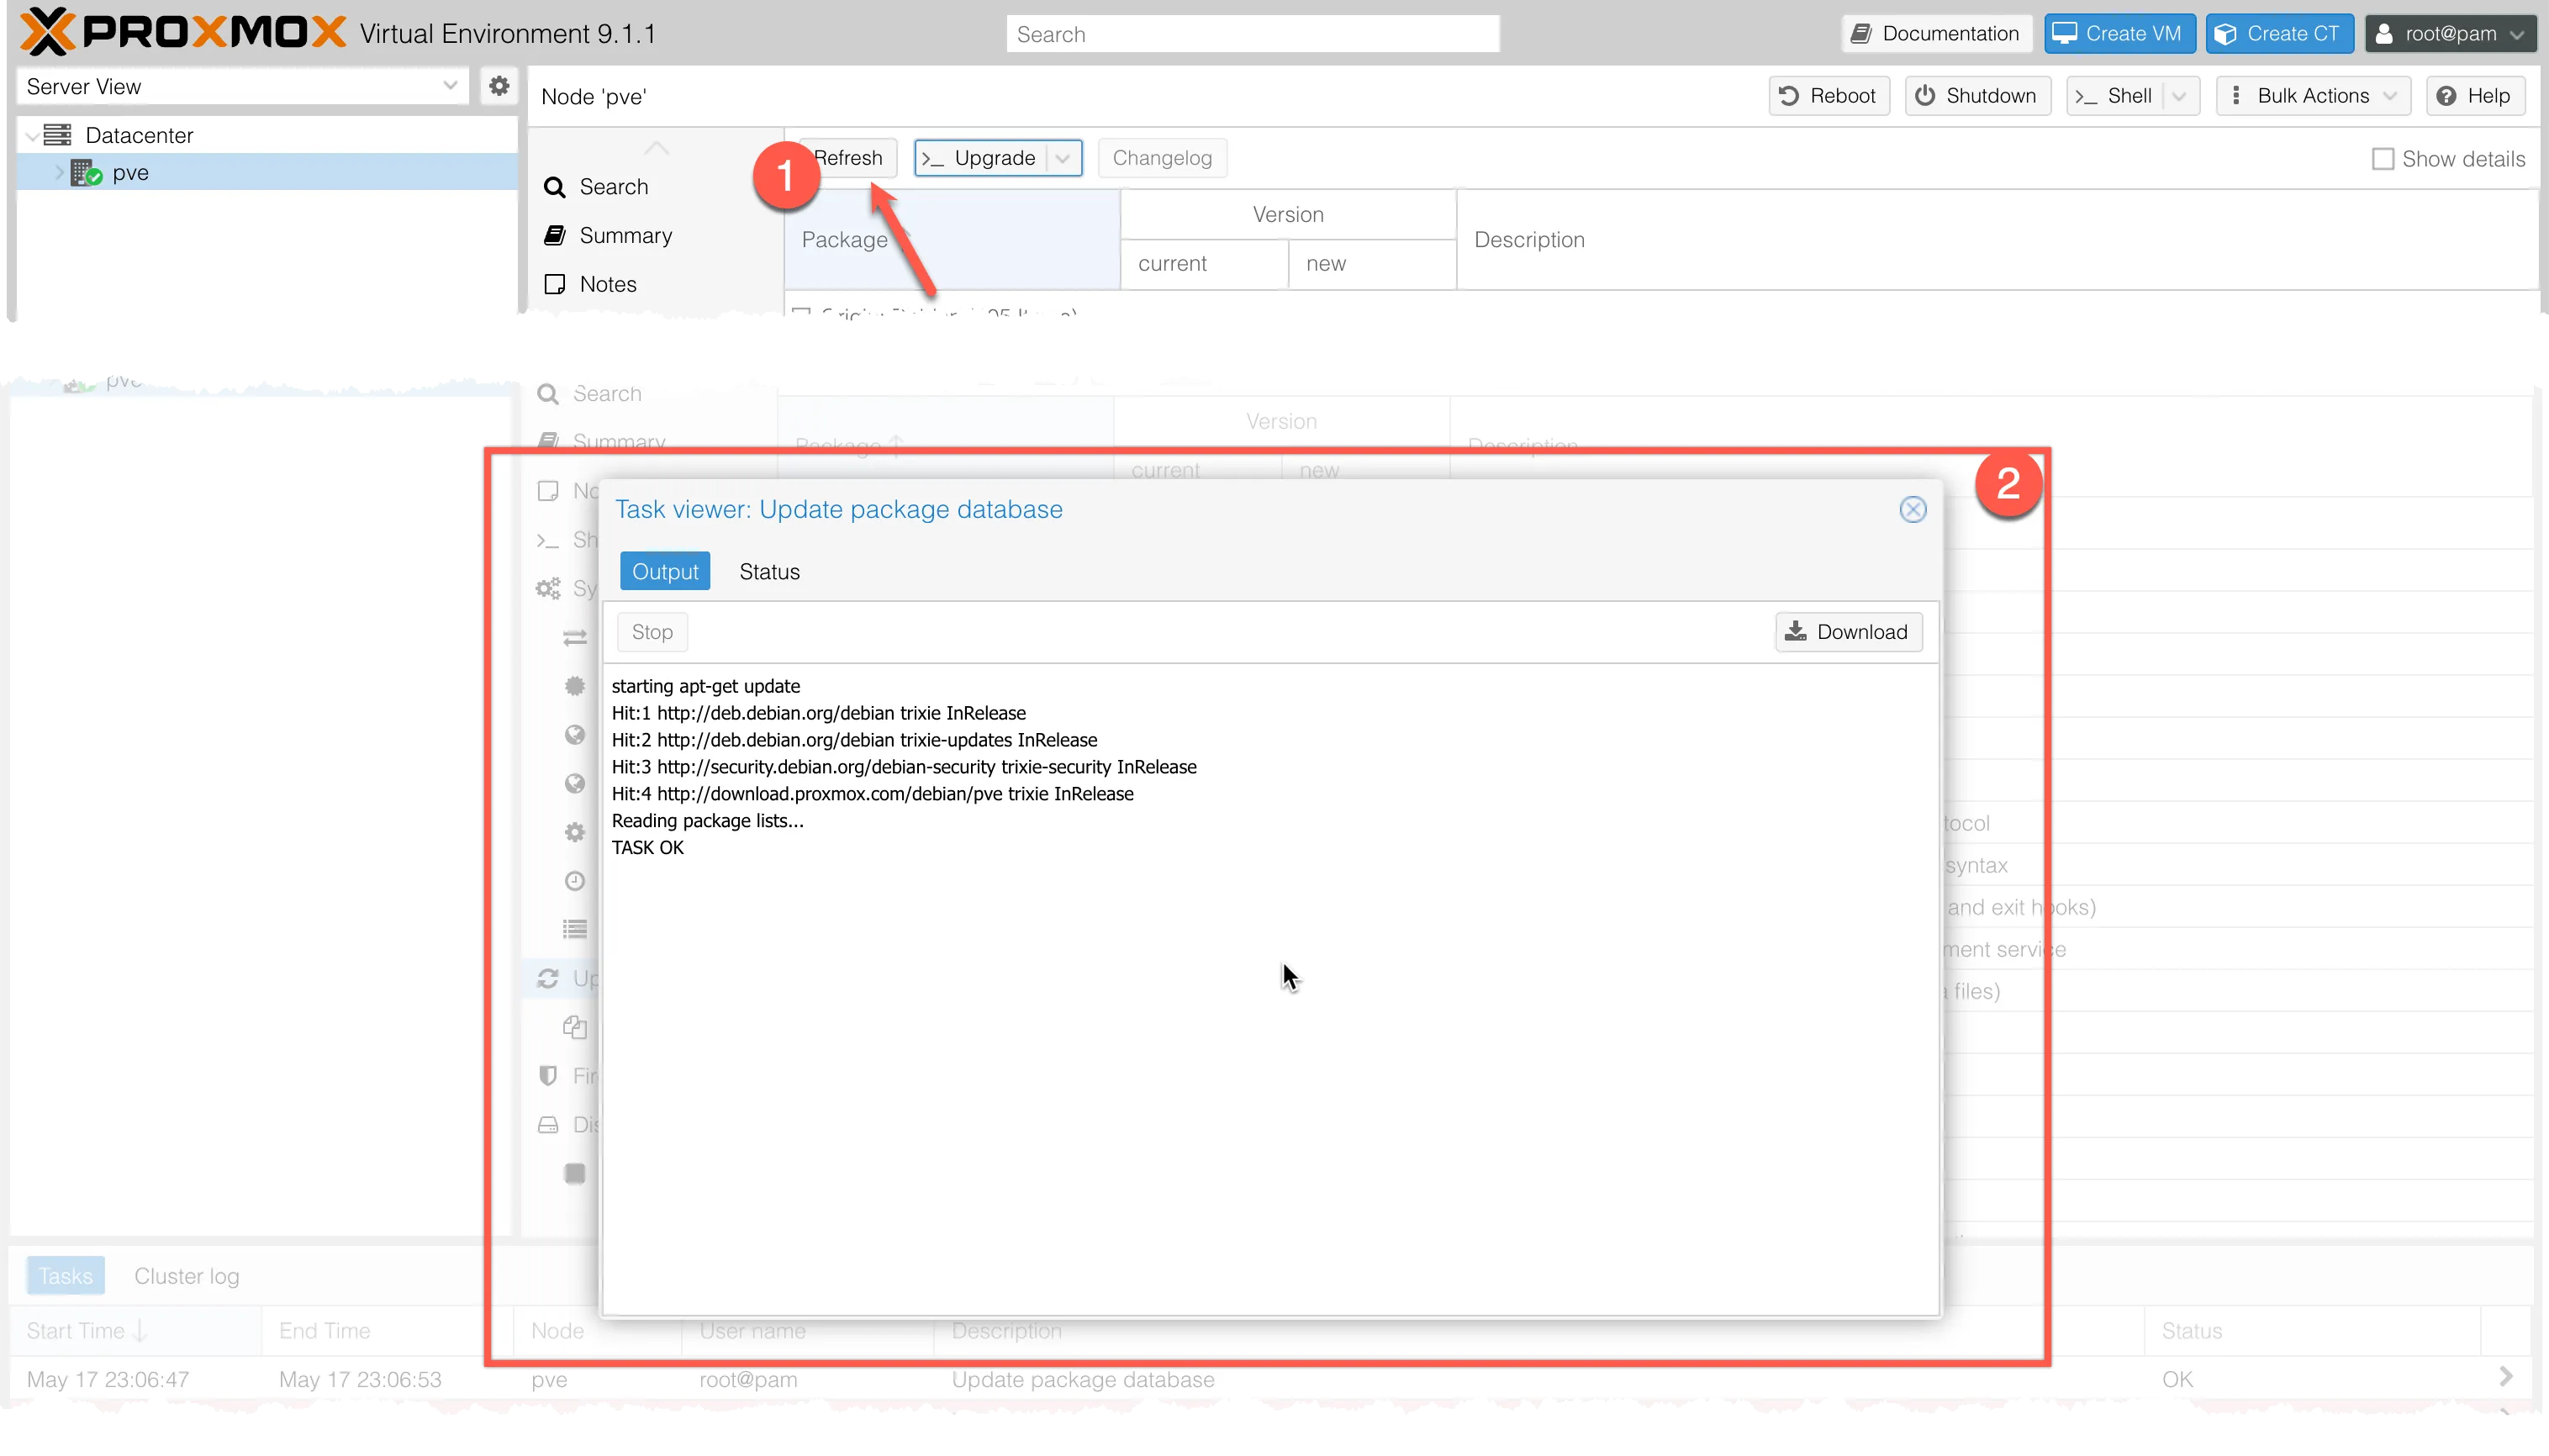
Wait for the task to complete. You should see output like:
Hit:1 http://ftp.debian.org/debian bookworm InRelease
Hit:2 http://security.debian.org bookworm-security InRelease
Get:3 http://download.proxmox.com/debian/pve bookworm InRelease
...
Reading package lists... Done
No authentication errors means you’re on the right repo.
Step 6 — Upgrade the Proxmox Server
Still on the Updates page, click Upgrade.
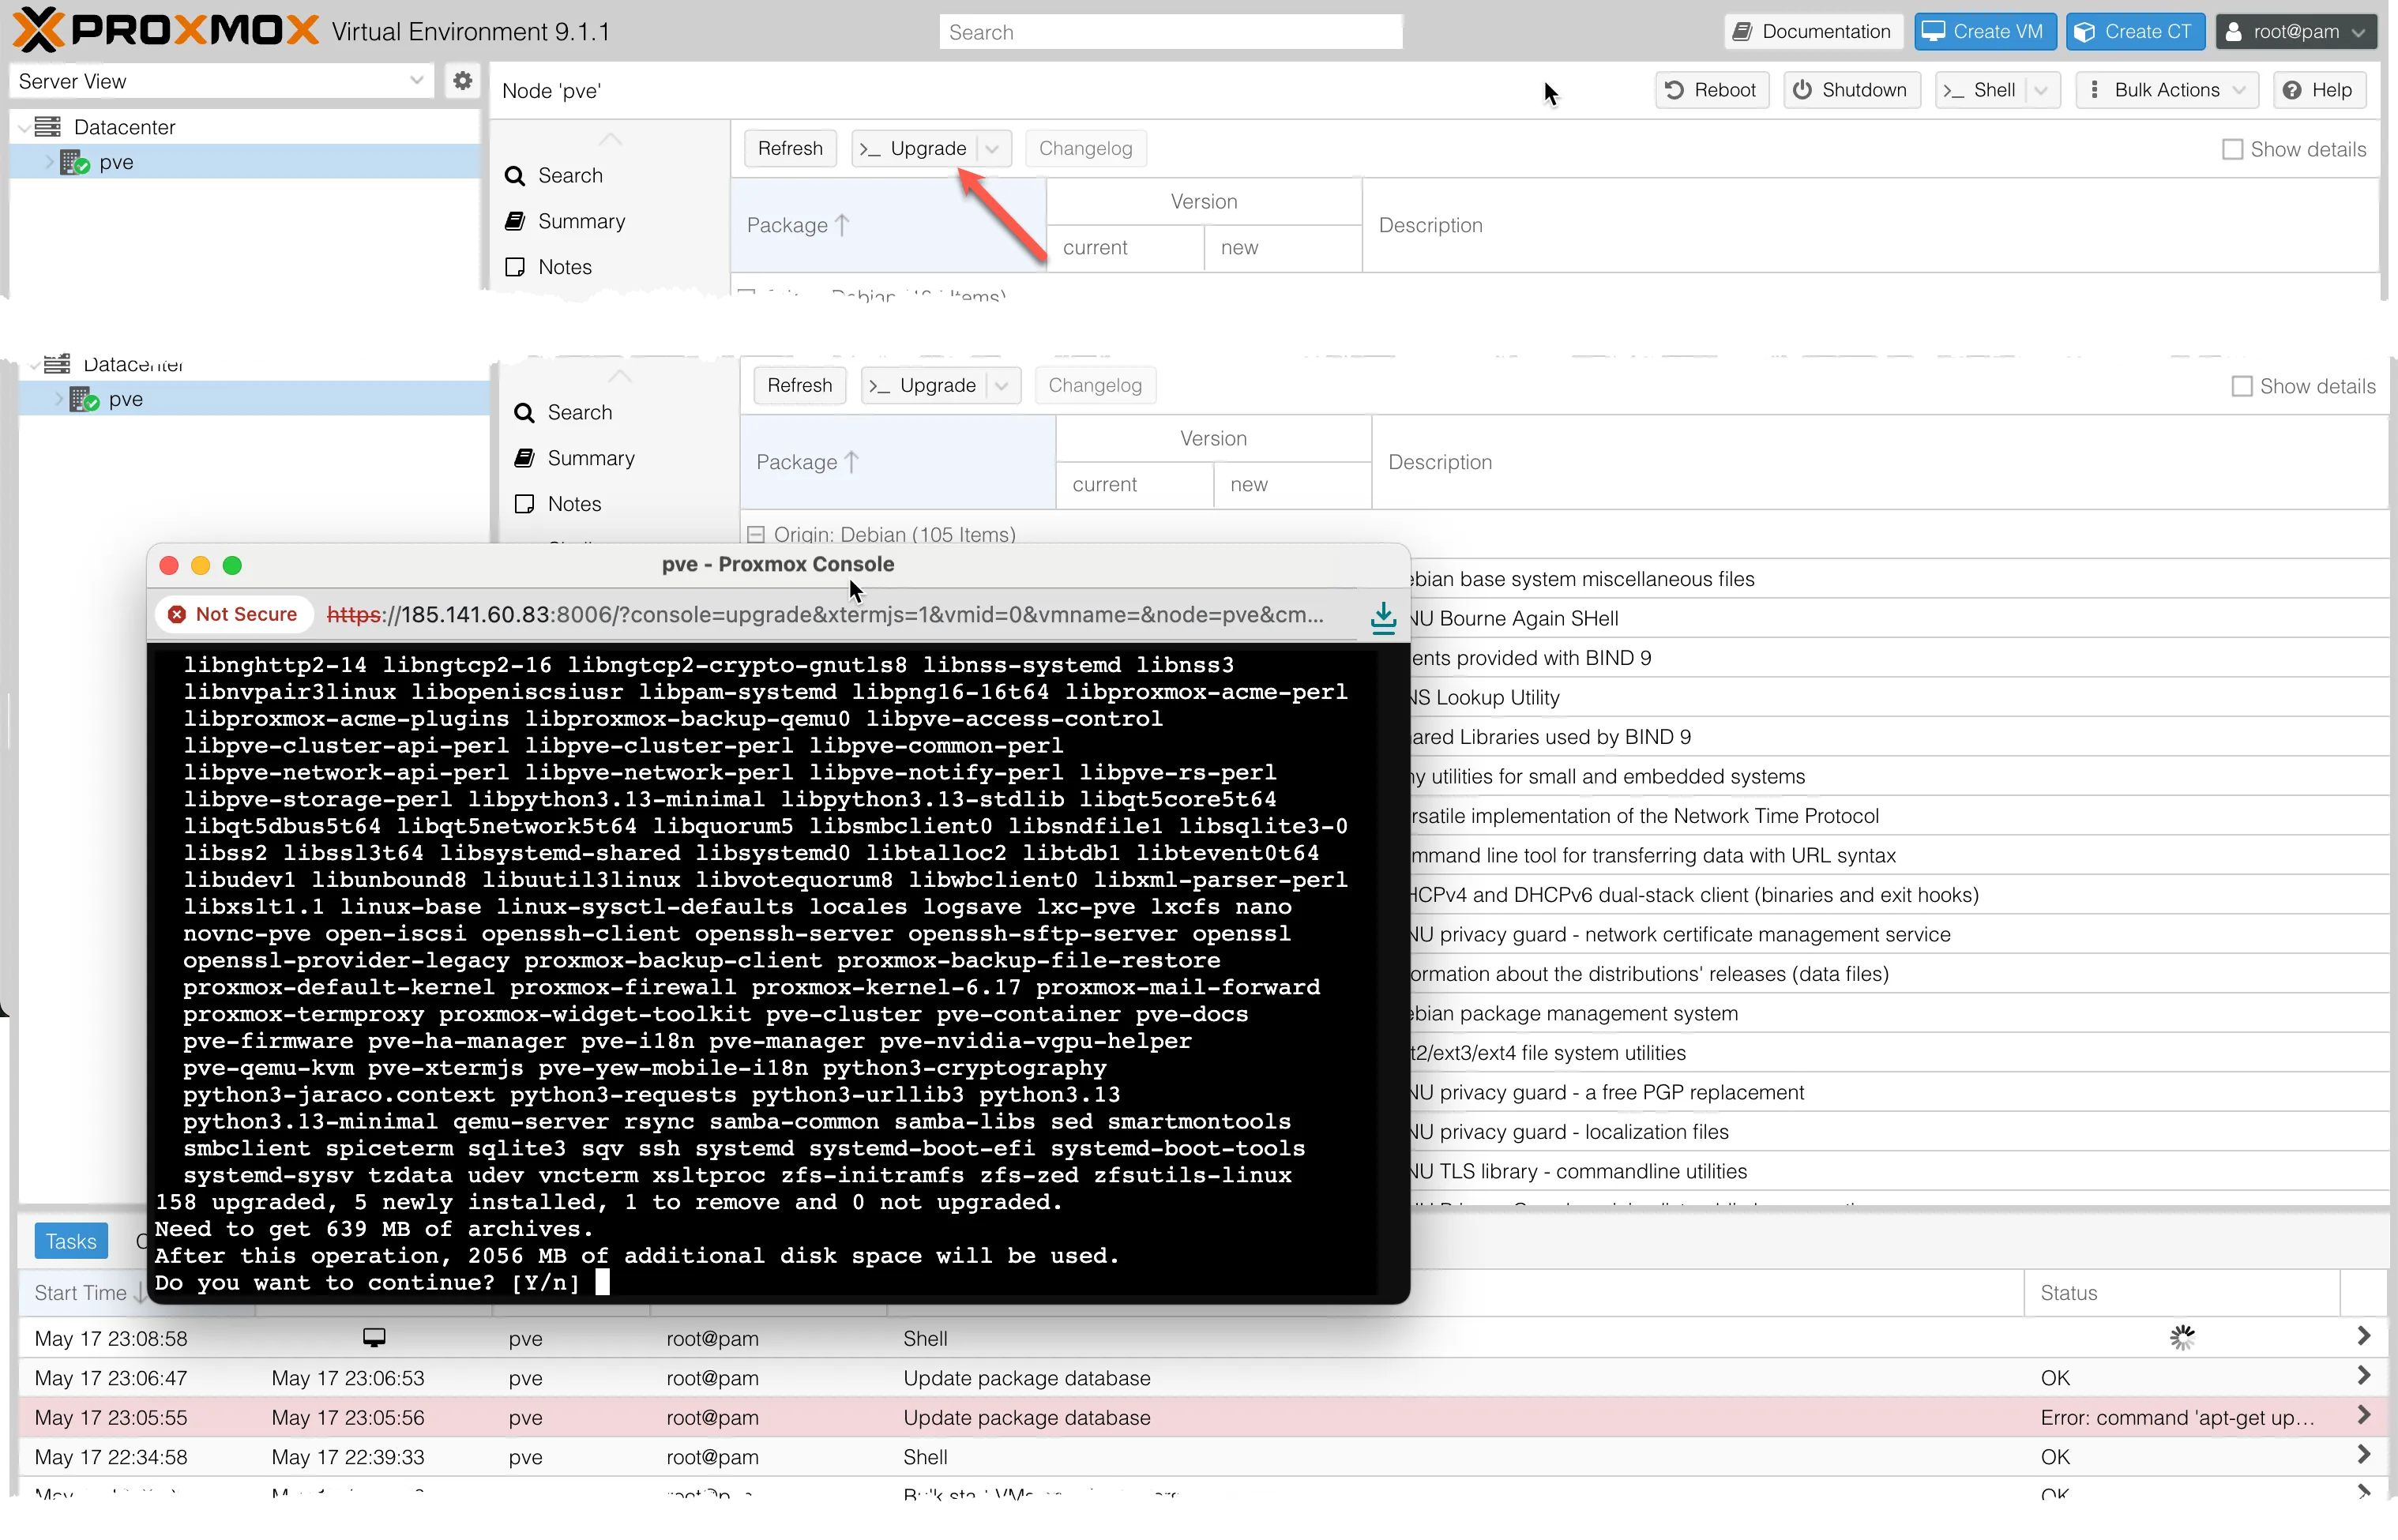
A terminal window opens inside the web UI and runs:
apt dist-upgradeYou’ll be prompted to confirm the upgrade. Type Y and press Enter.
The upgrade will download and install all pending packages. This may take a few minutes depending on how many updates are available and your connection speed.
Once it finishes, the terminal will show:
Processing triggers for man-db ...
...
Done.
You’re Up to Date
Your Proxmox node is now running on the free community repository and fully upgraded. From here you have a clean, up-to-date base to build on.
Coming up in Part 2: Setting up networking — understanding Proxmox’s default Linux bridge and creating your first network configuration for VMs and containers.
Part of the Proxmox Server Lab: A Visual Step-by-Step Guide series.